|
||||||||||
. . . And Another Time
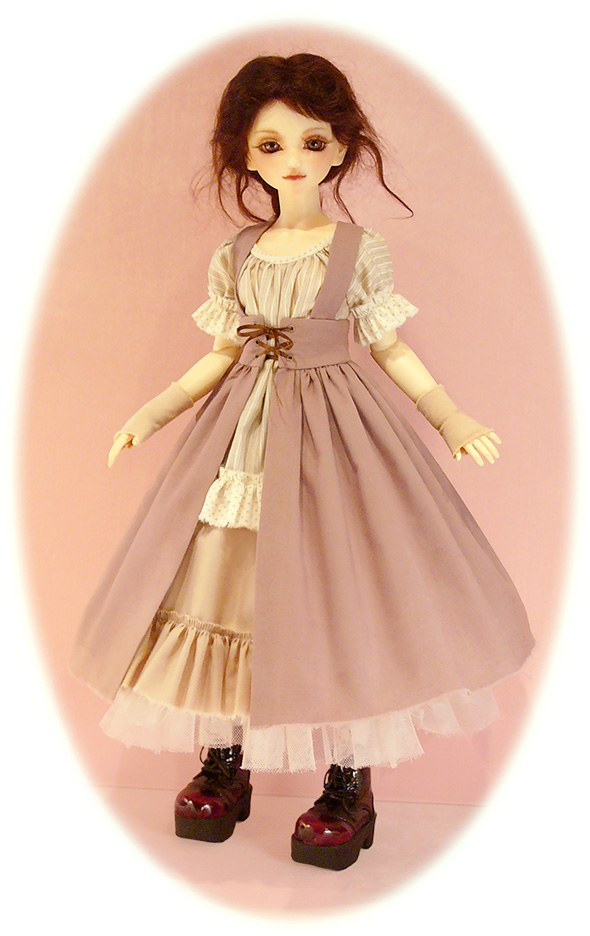
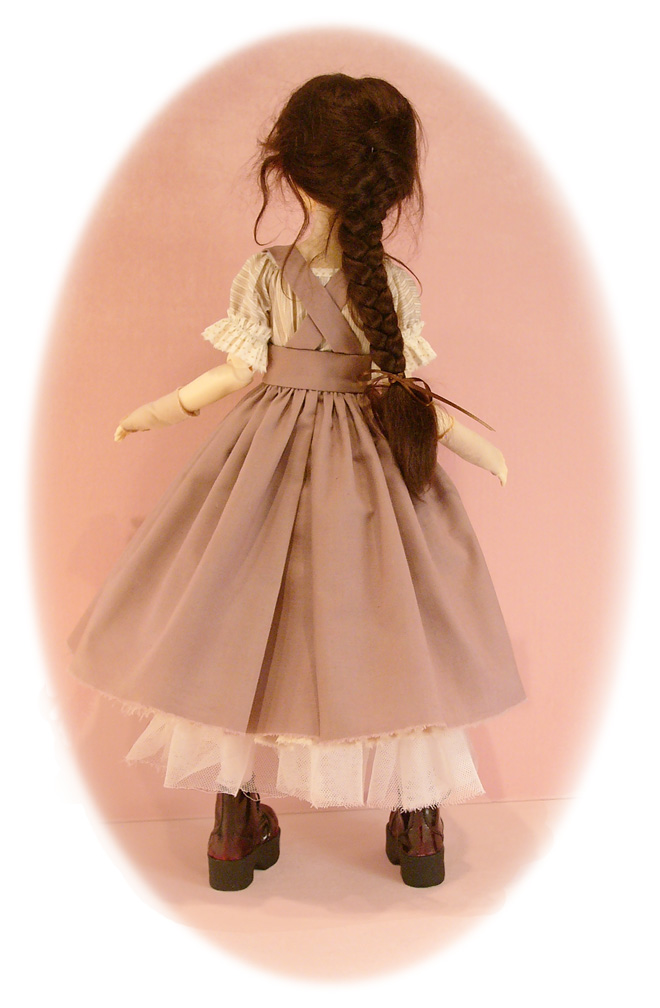
. . . And Another Time A variation on a Messenger from Another Place begins with the same top skirt and under skirt, paired with a short sleeve blouse and a pinafore-style overskirt. The blouse is made with the Blouse Front and Blouse Back patterns in #10 Takeshita-dori. Use the Neck Binding pattern in #10 Takeshita-dori or #11 Takeshita-dori Supplement as a guideline, or finish with bias binding. A 1 ½” wide gathered ruffled is added along the lower edge of the blouse and a 1” ruffle finishes the hem edge of the sleeve (bind the sleeve edge with bias binding before adding the ruffle). The pinafore-style overskirt begins by selecting the Waist Cincher from #10 or #11. You may need to add some width to the center back to accommodate the “thickness” of the gathers. Cut two straps 11 ½” long x a scant 2” wide, (Stitch long sides together with a ¼” seam, turn to the right side, and press flat). The skirt portion of this overskirt is very wide! You can adjust this dimension as you wish (even 36” wide is just fine). I cut this skirt 10 ½” x 45” (cutting the top edge and tearing the hem edge). I made a 3” inverted pleat at the center back, very tight gathers along the top, and turned in the center front edges 5/8” to form a facing. (You can do these steps as you wish.) Add this skirt portion to the waist cincher and finish the waist cincher lining by turning under the lower edge and hand stitching. Slip the garments on your doll, mark position for straps and eyelets and apply. Cutting guideline for ruffles: Measure the length of the hemline where the ruffle will be added. Multiply that measurement by 3, and use the resulting number as the length of the ruffle. #10 Takeshita-dori: http://www.gracefaerie.com/patterns/pattern10.htm #11Takeshita-dori Supplement: http://www.gracefaerie.com/patterns/pattern11.html Refer to pattern instructions for all other cutting and construction information.
|